Labeling Instruction Builder
What is a Labeling Instruction?
In order to give labeling task to freelance annotators, data science team needs to define specifications of a labeling task. Those specifications need to be converted to a user-experience. In TrainingData.io application specification builder is called labeling instruction. Labeling instruction is a list of objects that a data-scientist wants human-labelers to find in an image. Objects can have properties like color, size, shape etc. Data-scientist wants to present these properties in question-and-answer HTML form to the annotator.
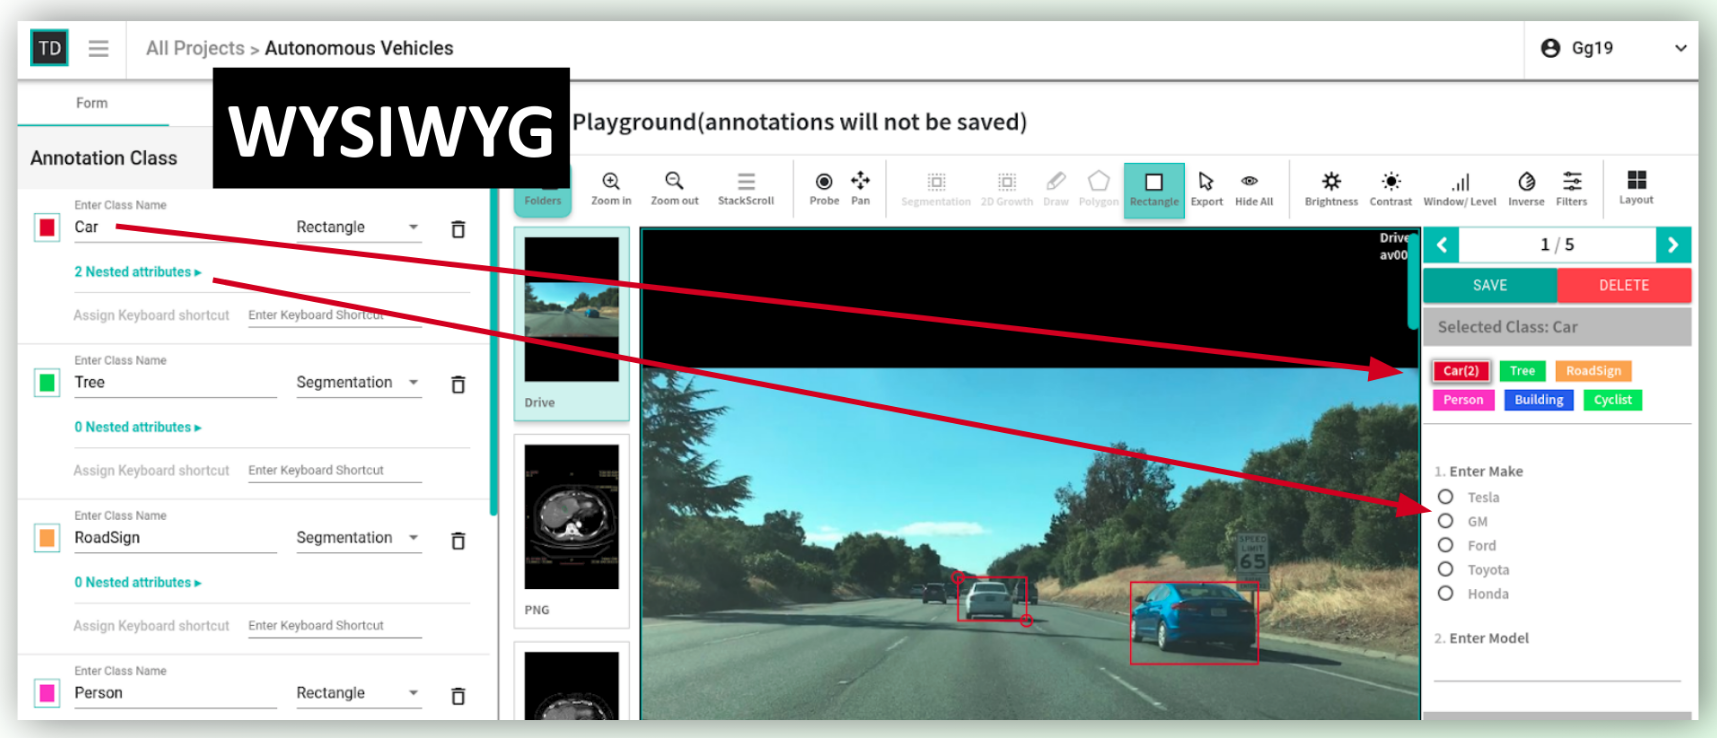
Labeling instruction has two parts to it. Left panel and right panel. The left panel shows list of classes, their attributes and image-attributes. The right-panel shows how annotation-user-experience appear to the annotator (exactly).
How to create a new Labeling Instruction?
As you add a class or an attribute on left panel, you will observe same class and attributes will show up on the right panel in real time.
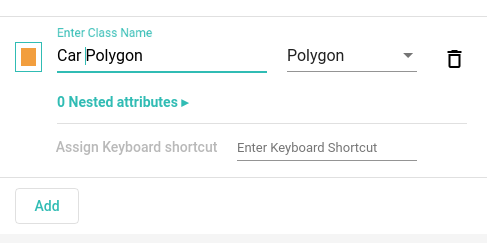
Step 1: Creating First Class-Type
Classes are abstract-representation of real world objects that machine learning model learns about. Each class can have a:
- Name: Associated real world object-class (like a car)
- Color
- Tool to be used to draw each object-instance belonging to that class
- Sub-attributes are the properties of that class type
Step 2: Adding Attributes to Class-Type
Attributes define properties of real world objects. A simple example is color of car is a property of that car. Data scientists would want to know these properties, so that they can use it to train machines that make decision.
An attribute is a question that you ask an annotator. There are four different data-types of an attribute:
- Text: alphanumeric data entry
- Multi-select Checkbox: a list of check boxes with multi-select functionality
- Single-select Drop down list: with single select functionality
- Single-select Radio button: with single selection functionality
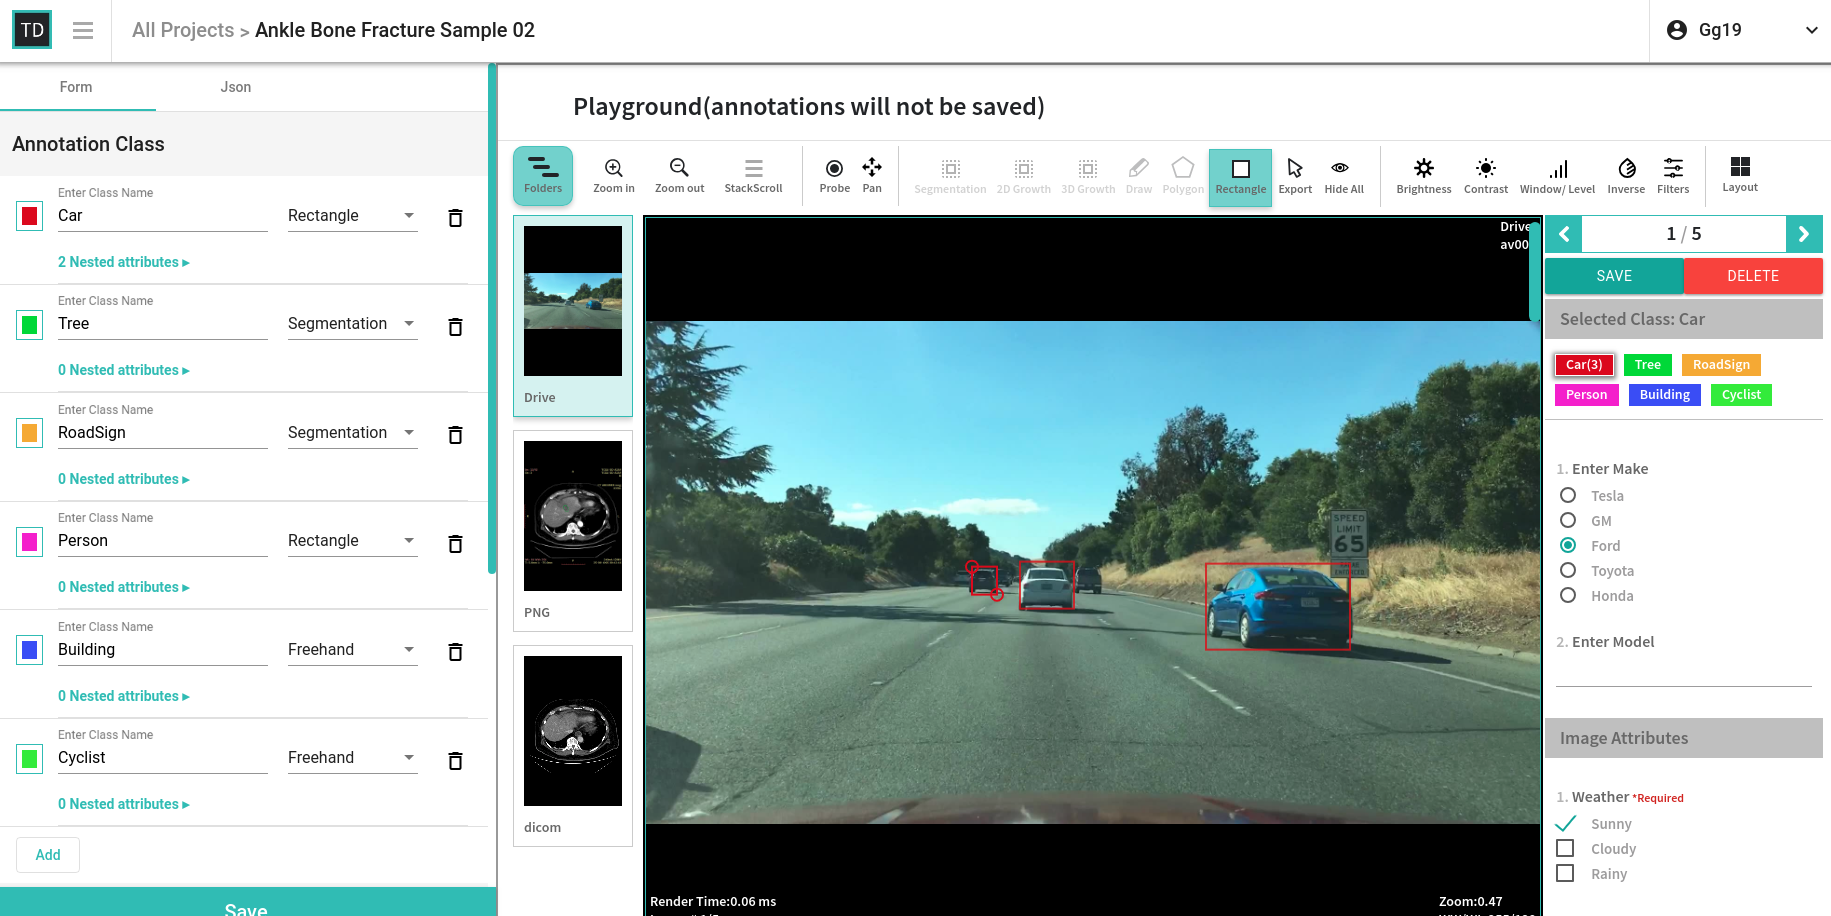
Step 3: Final Labeling Interface
After adding all classes and attributes to a labelling interface, a complete labelling interface will look like this: